Making Tissue Foild
What is tissue-foil?
Tissue-foil is a general term given to a folding paper made from different types of paper, one of which is aluminium foil, and the other is (usually) tissue paper. The characteristics of this paper are somewhat simialar to american/japanese foil, though it is usually much thinner and it is not always of a mettalic color and texture.
Advantages of tissue-foil
- You can make it very thin and therefore suitable for complex models
- You can completely erase incorrect creases (As opposed to regular foil)
- The paper is very strong and does not tear easily
- The paper remains in any shape you give it which makes it ideal for 3D shaping
- You can make it in any color you like
Disadvantages of tissue-foil
- You have to make it yourself and that takes time.
- It is very difficult to inverse the direction of the paper (valley to mountain)
How to make tissue-foil
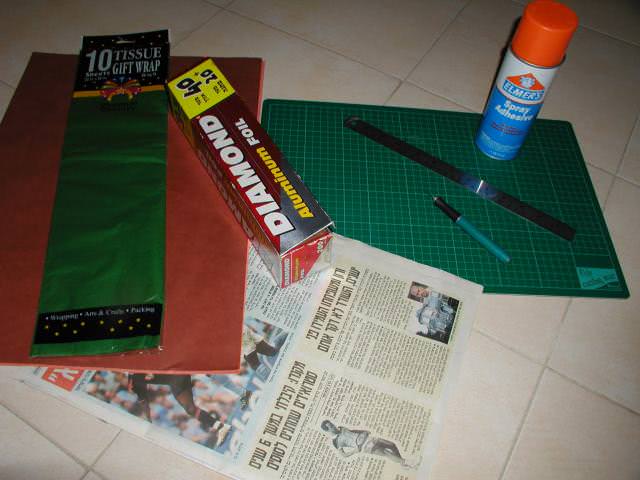
This picture show the different materials required to make tissue-foil:
In the center you can see the aluminium-foil. This is the kind which exists in any kitchen and can be found in all supermarkets. The one in the picture is only 30cm wide, but you can get it in much wider sizes. Note that one side of the foil is much brighter than the other.
On the left side of the picture you can see some of the other papers which can be used. The green one is tissue-foil, which can be found in most supermarkets in the U.S. (and cannot be found at all in Israel). The brown paper is a paper I found in a shop in Israel, and is labeled “silk paper” and is thicker than tissue paper. You can also use other papers, including even napkins! The thicker this paper is, the less potent the foil is - which makes it easier to fold but gives less freedom in the final shaping. The red devil is made from a regular paper-tissue, with the three layers it came in sperated for thinness.
The spray you see is “Spray Adhesive”, and can be found in most hardware and art stores.
The green board is a cutting mat. It is one of the most usefull items in my possession. You do not HAVE to use a cutting board - you can simple cut on the antique mahagony table in your living room - I’m sure your mom won’t mind.
On the cutting mat you can see the cutting knife. Just about any knife will do so long as it’s VERY sharp.
The ruler is also very important. A metal ruler is a must, as I’ve found that with plastic ones I tend to cut more of the ruler itself than the paper. A metal triangle is also usefull, but if your catting mat has a good grid on it it is not mandatory.
In order to not fill you floor with glue which will immobilize the cat, it is strongly recommended to use the daily sports section of the newspaper. If that section is missing, you can also use the economics sections.
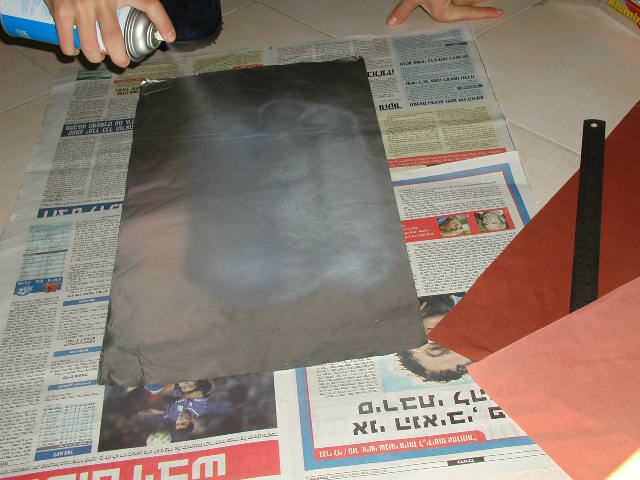
- Spread the newspapers on the floor. Make sure that they are flat and that no metal pins are left.
- Cut a large layer of foil, a bit larger than the target size. Note which side you put up, because there is a difference in it’s brightness.
- Spray the glue evenly on the foil, according to the manufacturer’s instruction. For your safety, it best not to do this in a closed room.
- Wait at least a minute. During this time you can cut the tissue paper to roughly a square,
larger than the target square.
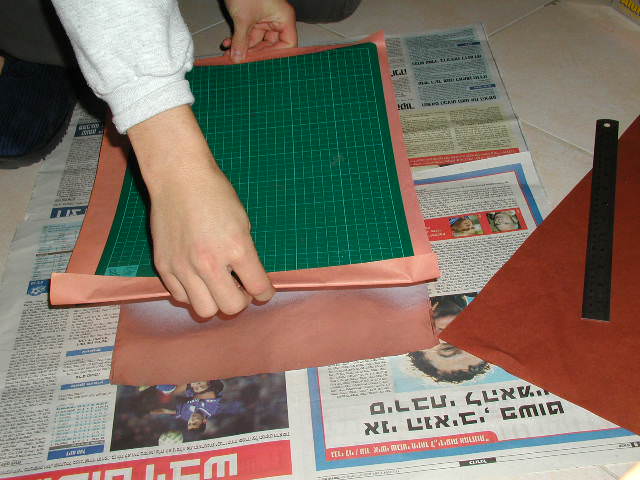
- This is the hardest part - connecting the tissue to the foil. Doing this rashly will result in lots of creases and “air bubbles”. I have tried various methods until I came up with this one, which make the connection without ANY creases, and not less important, it does it FAST. Take the cutting mat (or any other smooth, straight board), wrap the tissue paper around it so that it’s tight (You can use tape if you want), then, holding the board on both edges, simply lay it on the foil. That’s it!
- Turn the foil over and repeat on the other side. It is VERY important to give the glue several hours to dry before continuing. NOTE: I have NEVER given it more than a couple of seconds to dry.
- All that’s left is cutting it into a square, and this is not at all as simple as it sounds. I have found two methods to give good, accurate results. The first and fast one is to use the cardboard which comes in most origami-paper packs and cut around it. It seems that the cardboard is much more of a square than the papers it comes with. I heard this idea while I was in Chicago and attended a local CHAOS meeting, but unfortunaly I forgot the name of the guy who told me that (If it happens to be you, please email me and tell me so).
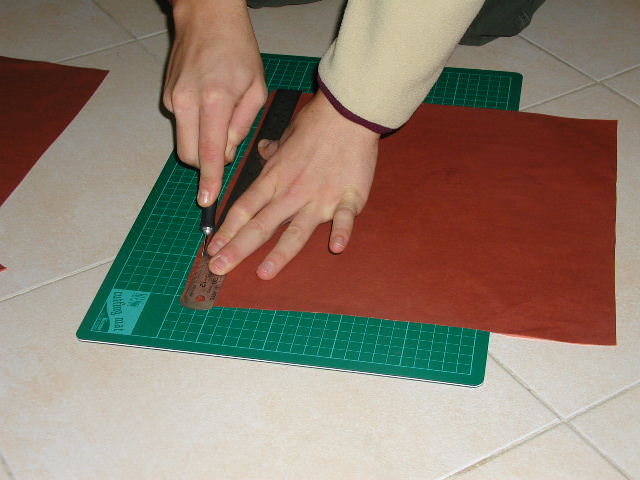
The first method is only good for standard sizes, which usually only go up to about 10”. To make larger or non-standard sizes, I use the following method: A. Use the ruler to cut one edge, as is shown in the above picture. This way we are sure that this edge is indeed a STRAIGHT line. I shall call this edge “the first edge” (I’m not very original with names)
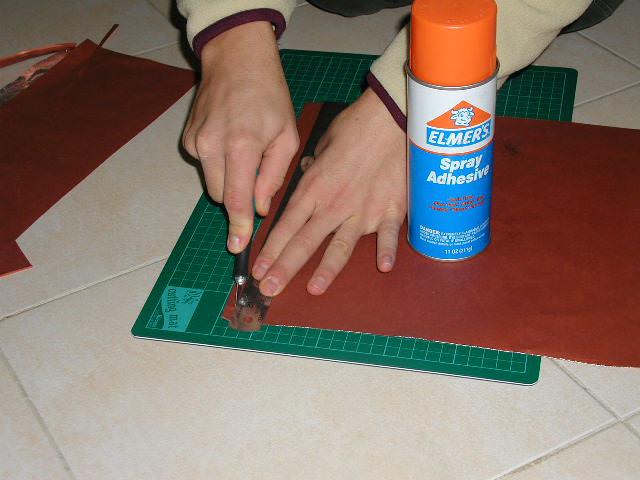
B. Cut another edge perpendicular to the first edge. Put a heavy object on the paper while doing this to ensure that it doesn’t move. We can either use a triangle or the grid on the cutting mat (I find the latter more accurate). To use the grid, place the first edge along one of the lines, and make a cut along one of the lines perpendicular to it. You should make this cut pretty close to the edge of the paper. C. Now, to cut the third edge, you simply repeat step B on the second edge. However, this time you have to make the cut at an exact point on edge B, and this point is the point where edge B is at the length we want our square to be. D. Repeat C one more time, again making sure you cut so the the third edge is of the correct length.
If you did everything right, you should now have a square. I know that there are faster ways of doing this using folding a triangle, but I find that they are much less acurate.


